Fastq file to Bigwigs with Galaxy server
From fastq to bigwig is a general analysis module in high-throughput sequencing analysis. Because of performance problems, our server cannot provide you with direct conversion.
Therefore, to help you start analysis from fastq files, we provide a tutorial below to transform a fastq file to big wig files.
Galaxy (https://usegalaxy.org/)
provides a friendly and powerful user interface for sequcing data analysis.
The entire conversion process from fastq to bw file can be run on the platform.
Here we use pictures and annotations for a clear explanation for all steps.
-
1. Upload fastq file
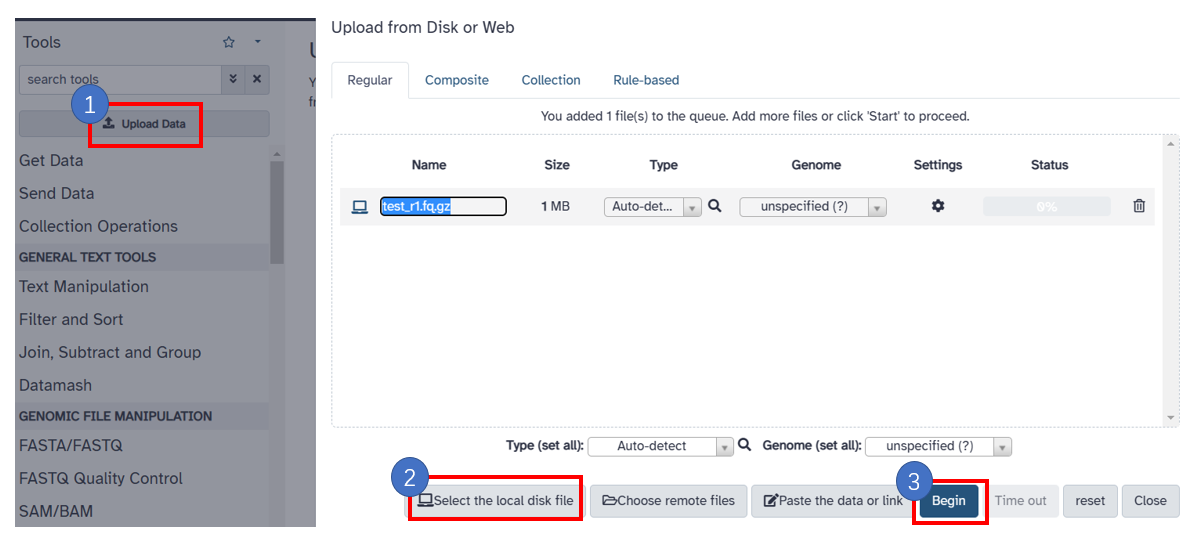
 1. Click the [Upload Data] button.
 2. Click [Select the local disk] and select your local sequencing file.
 3. Click [Begin] button to start uploading data.
-
2. Remove polyA and adaptors
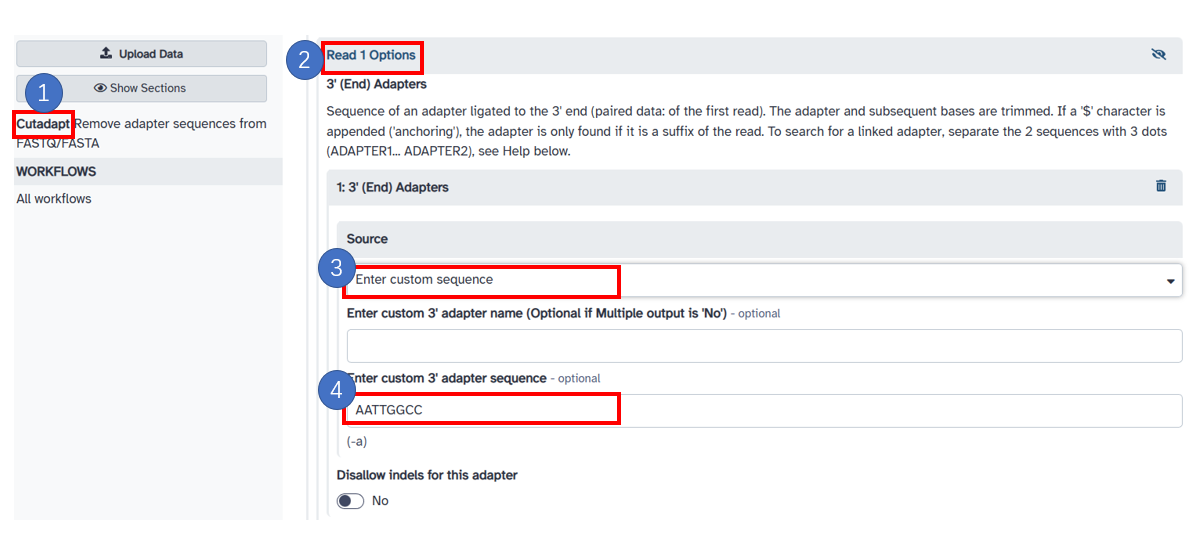
1. Click the [Cutadapt] option on the left panel. 2. Select [Read 1 Options]. 3. Select the [Enter custom sequence] option and enter your adaptor sequence like [AATTGGCC]. 4. You can also enter [A {100}] to remove the Polya sequence. -
3. Trim low quality bases
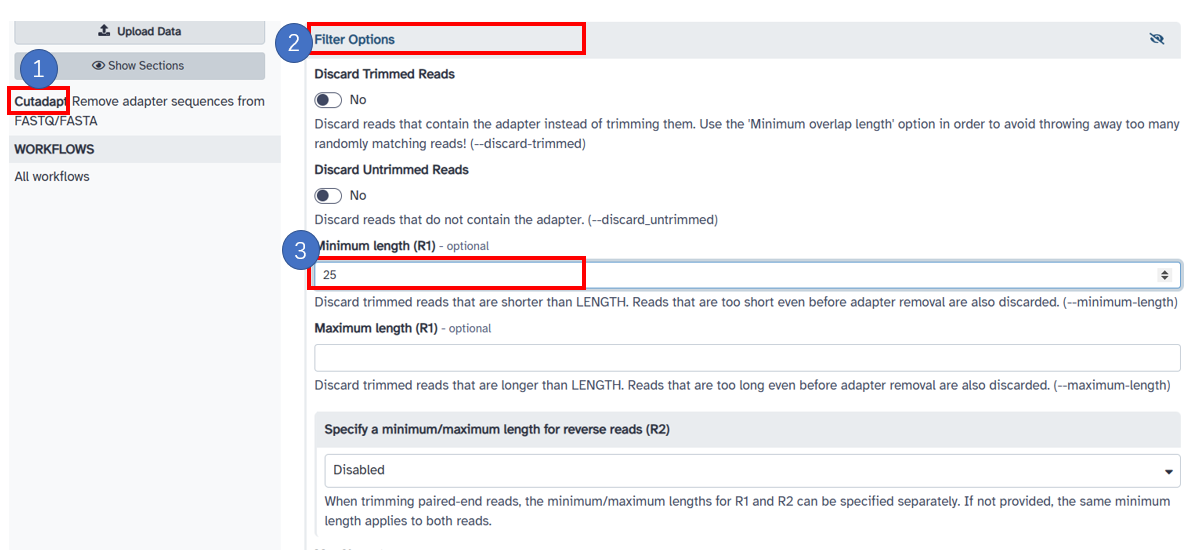
1. Select 'adapter options' under [Cutadapt].
 2. Click [Filter Options] button, the trimming option 'maximum error rate' and 'minimum overlap length' use the default values.
 3. Fill in the [Minimum Length(R1)] as [25].
-
4. Map to reference with bowtie2
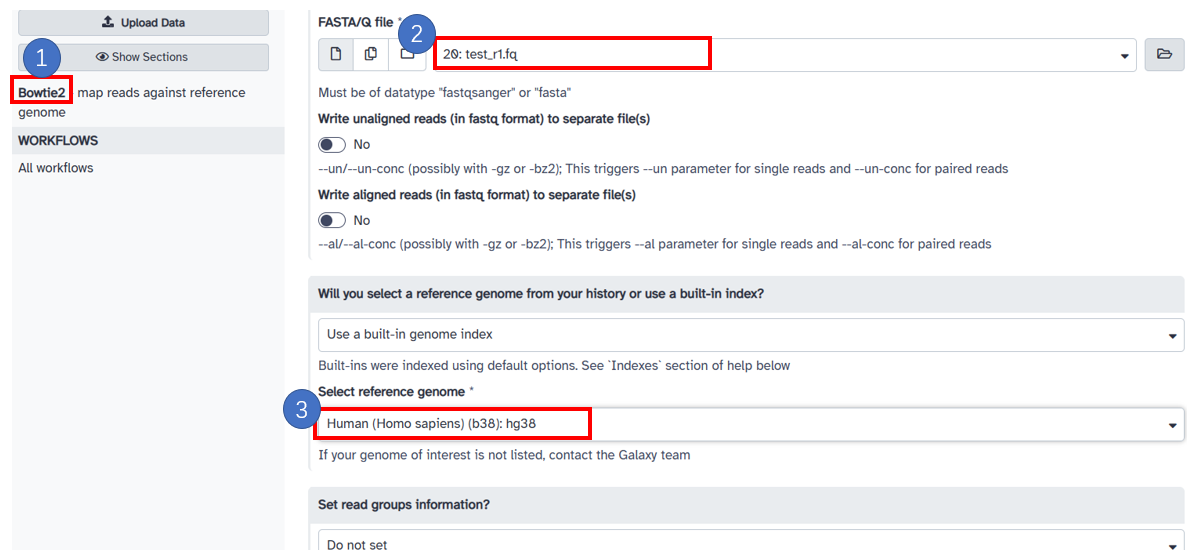
1. Select [Bowtie2] in the left sidebar.
 2. Select the [FASTA/Q file] after removing the adaptors in the previous steps.
 3. Select the built-in [reference genome] in server, here we select [Human(Homo sapiens)(b38): hg38].
-
5. Sort sam with samtools
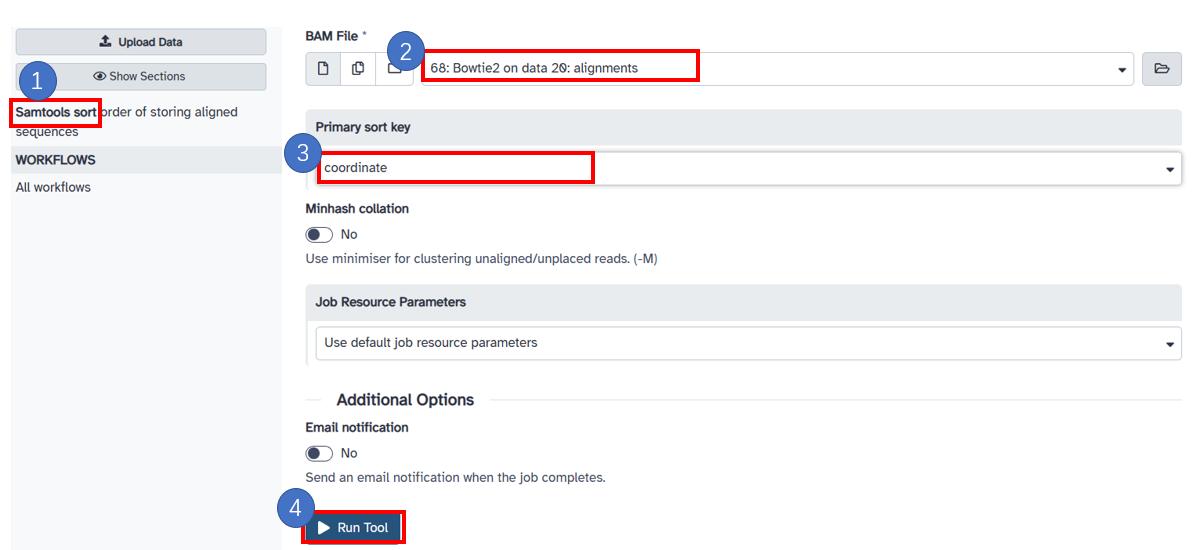
1. Select [Samtools sort] in the left panel.
 2. Select the [BAM File] generated in the previous step.
 3. Select the [Primary sort key] as [cooradinate].
 4. Click [Run Tool] button.
-
6. Compress sam file to bam file

1. Select [Samtools view] in the left panel.
 2. Select the [SAM/BAM/CRAM data set] generated in the previous step.
-
7. Deduplication
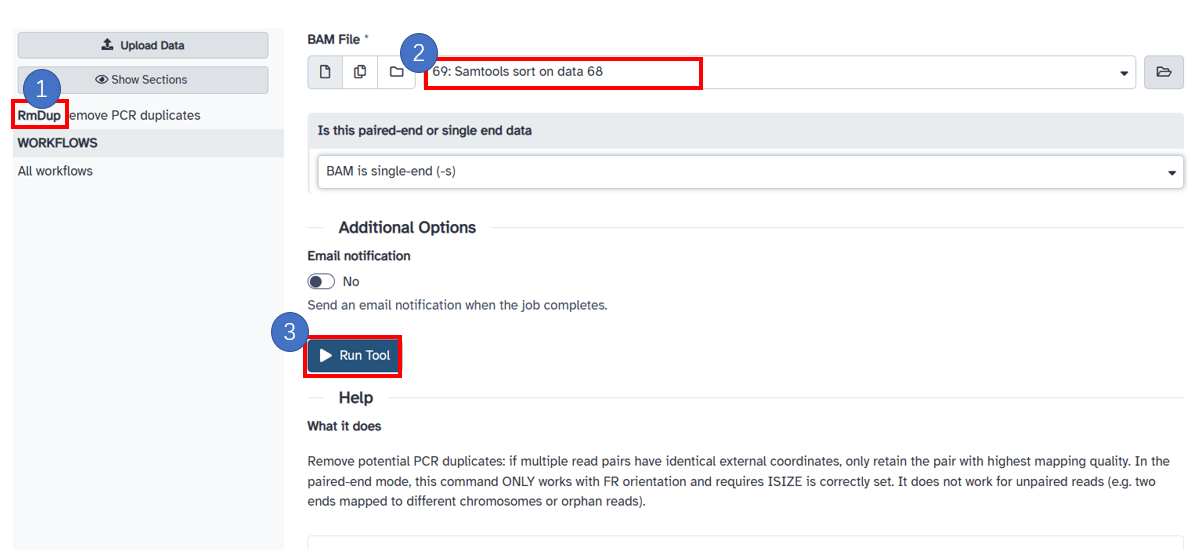
1. Select [RmDup] in the left panel.
 2. Select the [BAM File] generated in the previous step.
 3. Click the[Run Tool] button.
-
8. Filter unique mapping reads
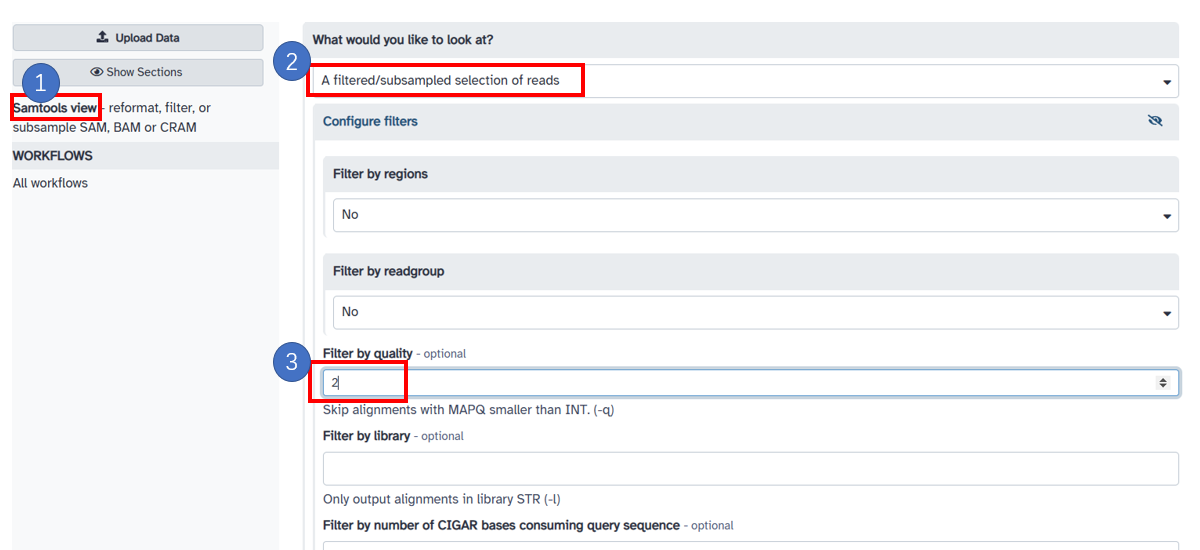
1. Select [Samtools view] in the left panel.
 2. Choose [A filtered/subsampled selection of reads]
 3. Fill in 2 in [Filter by quality]
-
9. Generate forward strand bw with bamCoverage
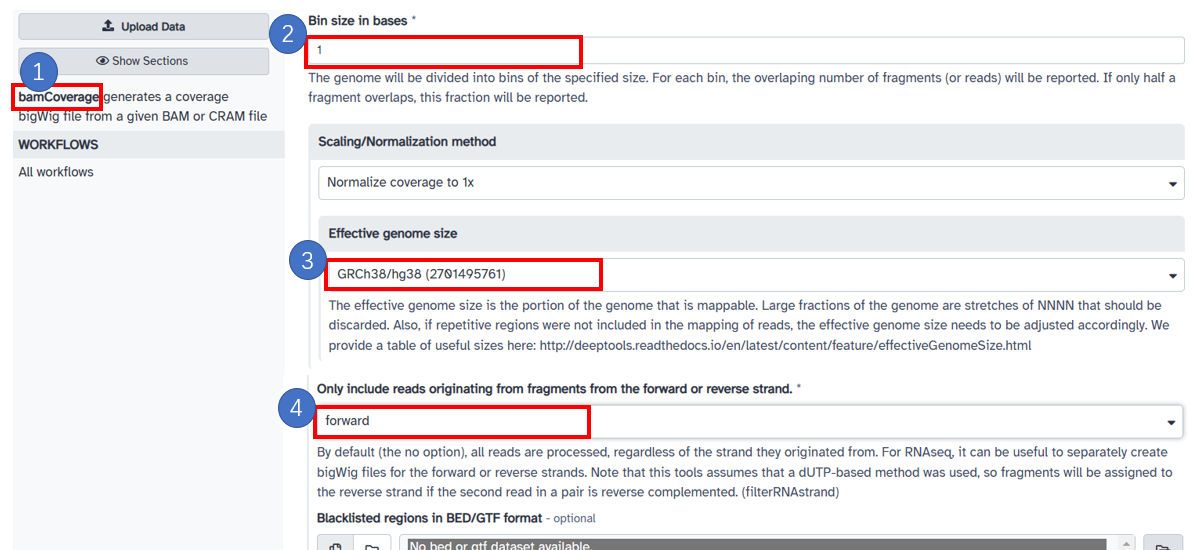
1. Select [bamCoverage] in the left panel.
 Select bam data in your galaxy history or upload your local file.
 2. Input [Bin size in bases] with 1.
 Select [Scaling/Normalization method] with [Normalize coverage to 1x].
 3. Choose [Effective genome size] based on the reference.
 4. In [Only include reads originating from fragments from the forward or reverse strand.] frame, choose forward.
-
10. Generate reverse strand bw with bamCoverage
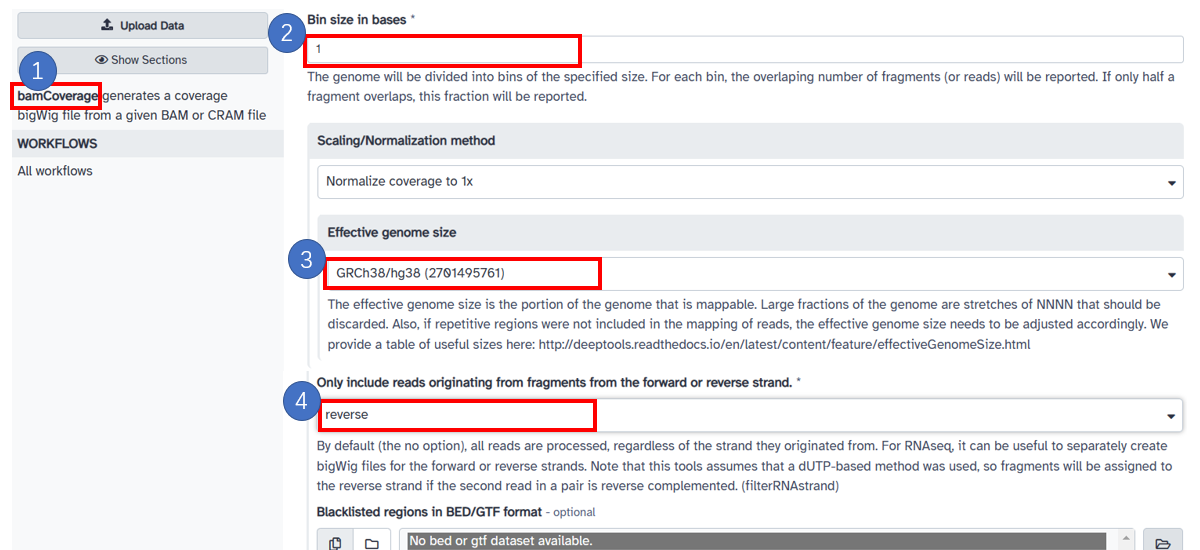
1. Select [bamCoverage] in the left panel.
 Select bam data in your galaxy history or upload your local file.
 2. Input [Bin size in bases] with 1.
 Select [Scaling/Normalization method] with [Normalize coverage to 1x].
 3. Choose [Effective genome size] based on the reference.
 4. In [Only include reads originating from fragments from the forward or reverse strand.] frame, choose [reverse].
-
11. Obtain first base of the alignment with bamCoverage
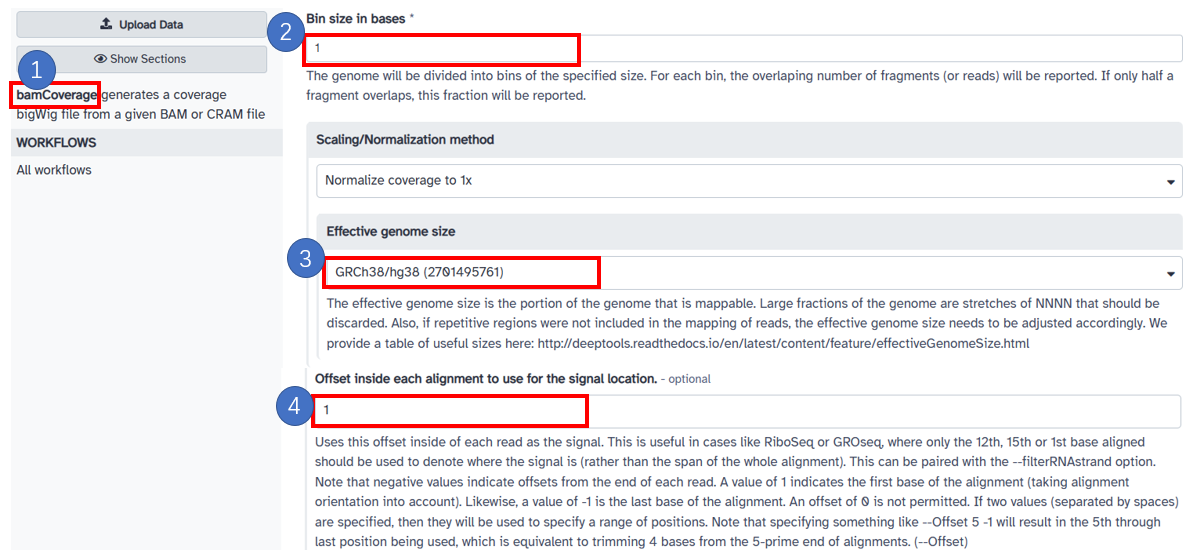
1. Select [bamCoverage] in the left panel.
 2. Input [Bin size in bases] with [1].
 3. Select [Scaling/Normalization method] with [Normalize coverage to 1x].
 4. Input [Offset inside each alignment to use for the signal location] with [1].
 This step can be paired with the [Only include reads originating from fragments from the forward or reverse strand.] option to get forward and reverse bw in 1bp.